Showing posts with label chocolate. Show all posts

Thursday, September 3, 2009

birthdays and tarts! part II


For M's birthday - a fat duck and this little chocolate tart. The crust is from the banana cream tarts and the chocolate ganache from the same recipe is spiked with a few teaspoons of Bailey Irish Cream. I also broke up pieces of hazelnut brittle to add to the bottom of the tart. The assembly was easy. Tart shell, brittle, chocolate ganache. Topped it off with a few small shards of caramel sugar.

Hazelnut Brittle (adapted from Bobby Flay)

1/2 cup white sugar
2 tbsp water
2 tbsp light corn syrup
1 tbsp butter
pinch salt
1/2 cup toasted hazelnuts, chopped or halved


Heat sugar, water, corn syrup and salt in a heavy saucepan over medium heat until it becomes a medium amber in color. Stir in butter and hazelnut. Spread onto a greased pan and allow the mixture to cool. Break into smaller pieces.

Friday, December 19, 2008

peace for you


Dorie Greenspan called these cookies the brainchild of French chef Pierre Herme, declaring it to be as important a culinary breakthrough as Tollhouse cookies. They are chocolate sables, dark with cocoa and flecked with bittersweet chocolate. The surprising and lingering aftertaste as the flavor travels to the back of the tongue is that of salt. Pierre Herme uses fleur de sel, a moist delicate French sea salt. Have you noticed that salt makes sweets taste sweeter and chocolate chocolatier?

When the recipe was published in her first cookbook, it was called Korova cookies. In her new book it is presented under a new name. Her neighbor, upon trying them, was convinced that a daily dose of these cookies is all that is needed to bring lasting planetary peace and happiness. So they were dubbed World Peace Cookies.


World Peace Cookies
Makes about 36 cookies

1 1/4 cup all-purpose flour
1/3 cup unsweetened cocoa powder
1/2 tsp baking soda
1 stick plus 3 tbsp (11 tbsp) unsalted butter, at room temperature
2/3 cup light brown sugar
1/4 cup granulated sugar
1/2 tsp fleur de sel or 1/4 tsp fine sea salt
1 tsp vanilla extract
5 oz bittersweet chocolate, chopped into little chips

Sift flour, cocoa, and baking soda together.

Working with a stand mixer, preferably with a paddle attachment, or a hand mixer and a large bowl, beat butter until soft and creamy. Add in brown and white sugar, salt and vanilla, and beat for 2 minutes more, scraping down the bowl occasionally. Pour in the dry ingredients and cover bowl with a towel. Pulse the mixer at low speed about 5 times, a second or two each time. If there's still a lot of flour on the surface of the dough, pulse a few times more; if not, remove the towel. Mix at low speed for about 30 seconds more, just until the flour disappears into the dough. It is important to work the dough as little as possible. Toss in the chocolate bits and mix until just combined. (The dough will seem very dry at first, but keep incorporating the dry ingredients into the butter mixture - I did this part by hand with a spatula - and it will eventually come together)

Turn the dough out on a work surface, gather it together and divide in half. Working with one half at a time, shape dough into logs that are 1 1/2 inches in diameter. Cover in plastic wrap and refrigerate for at least 3 hours.

Preheat the oven to 325 degrees. Using a sharp knife, slice the dough into rounds that are 1/2 inch thick (I found this to be too thick, I cut mine 1/3 inch thick). If the dough crack when you cut them, just press the pieces back together on the baking sheet. Arrange the rounds on the baking sheet, leaving about 1 inch between each.

Bake the cookies for 12 minutes. They wouldn't look done nor will they look firm, but as they cool they'll harden a bit. Transfer cookies to a cooling rack and allow them to rest until just warm. They're best served at this point or at room temperature.

Saturday, December 13, 2008

new flavors, basic recipe


I had planned on baking Dorie Greenspan's "Best Chocolate Chip Cookies" the other night. Her recipe made almost 4 dozen, so I was going to halve it and modify it to also make some white chocolate cranberry cookies with pistachios. It was late and I had stuff on my mind, so somehow I added in 2 eggs instead of 1 large egg as required. Past experience told me that if I continue with the recipe I'm going to end up with puffy cookies, which I hate. But I was hoping that since the eggs were so small, they would only really be...1 1/2 large eggs. I went ahead and baked off 1 or 2 to try. Nope, puffy and cakey. No good. The dough tastes great though, so I think I'm going to freeze it and use it in cookie dough ice cream later on. Or eat it straight when The Small One comes over. Shhh...


Fast forward to this morning. I decided to use my tried and true basic cookie recipe since I was baking for my friend, and didn't want to mess up again. I've used the recipe for chocolate chunk cookies, chocolate walnut, white chocolate cranberry, etc. I was making white chocolate cranberry cookies with pistachios today. The pistachios I bought were shelled and raw, so I toasted them slightly in a dry pan, and tossed them in.


Nom nom nom...lucky I gave most of these away

Friday, October 24, 2008

Black Bottom Cupcakes


Black bottom cupcakes - the baby of moist chocolate cake and silky cheesecake - what's there not to love ^^

I made some regular ones and some with thickened cherry juice in the chocolate batter, then topped them with whole preserved cherries.


Black Bottom Cupcakes
makes 2o regular size cupcakes


For chocolate batter:
1 1/2 cup all-purpose flour
1 cup white sugar
1/3 cup unsweetened cocoa powder
1 tsp baking soda
1/4 tsp salt
1/2 cup milk
1/2 cup yogurt
1/3 cup vegetable oil
1 tablespoon cider vinegar
1 tsp vanilla extract

For cream cheese filling:
1 package cream cheese, softened
1 egg
1 tsp vanilla extract
1/4 cup sugar
1/2 cup miniature chocolate chips

To make the chocolate batter:
Combine flour, 1 cup sugar, cocoa powder, baking soda, and salt. Make a well in the middle of the dry mixture and add in milk, yogurt, oil, vinegar, and vanilla extract. Stir until just combined.

To make cream cheese filling:
Beat softened cream cheese with sugar, egg, and vanilla until smooth. Stir in chocolate chips.

To assemble:
Line standard-size cupcake pans with liner or grease lightly. Fill no more than 1/2 way with the chocolate mixture. Add about 1-2 tbsp of the cream cheese filling on top. Bake in a preheated 350 degrees oven for about 20 minutes.

Friday, September 12, 2008

Baked Bittersweet Chocolate Mousse


Imagine holding a small ramekin in one hand, a spoon in another, the warm aroma of chocolate tickling your nose, the dusting of powdered sugar speckling the dark surface. The spoon slips in, and the smooth richness spreads over your palate, the intense chocolate melting on your tongue.

A recipe with 5 simple ingredients - make and enjoy ~

Baked Bittersweet Chocolate Mousse
from Kitchen Wench
makes for 8 ramekins

170 g bittersweet chocolate, finely chopped
1/4 cup milk (water or coffee, or 1/2 cup heavy cream)
1 1/2 tbsp liquor of your choice (rum, amaretto, brandy, etc.) - optional
3 large eggs
3 tbsp sugar

Melt chocolate over a double boiler with milk until smooth. Remove from heat and add in liquor if using it.


In a separate bowl, beat eggs and sugar using an electric beater until light and fluffy, about 3-4 minutes. The eggs should be pale and have the appearance of soft whipped cream.


Fold in 1/4 of the eggs into the chocolate mixture and stir to combine. This will lighten the chocolate and prepare it for the addition of the rest of the egg. In 2 stages, gently fold in the remaining egg mixture, being careful to not deflate it. Divide among ramekins and place ramekins in a baking pan.

Fill the baking pan with boiling water until it come halfway up the ramekin. Make sure that no water actually gets into the chocolate mixture. Bake in a preheated 320 F for 15-18 minutes, until the top is barely set. Allow mousse to cool (or not) before serving. Garnish with fruit, whipped cream, powdered sugar, etc.

Saturday, August 9, 2008

Chocolate-Crunched Caramel Tartlettes


A friend of mine ordered something for me a few months ago, and in return asked me to simply bake for him. I guess I was flattered that he held my baking skills in such high regard that he would take that over actual payment. He wanted something chocolatey. And so here it is, a little late, but nonetheless a sign of my appreciation. For you, my creme-brulee-loving friend, is Dorie Greenspan's Chocolate-Crunched Caramel Tart.

This is great in small doses, rich with chocolate, cream and butter. It's simple yet very decadent.


Chocolate-Crunched Caramel Tart

Sweet Tart Dough:
1 1/2 cups all-purpose flour
1/2 cup confectioner's sugar

1/4 tsp salt

1 stick plus
1 tbsp unsalted butter (cut into small pieces and frozen)
1 large egg yolk

Caramel:

1/2 cup heavy cream
1/2 cup sugar, sifted

1 tbsp light corn syrup

2 tbsp salted butter (at room temperature and cut small)

a pinch salt if using unsalted butter


Ganache:
8 ounces bittersweet chocolate, finely chopped
1 cup plus 2 tbsp heavy cream

4 tbsp unsalted butter (at room temperature and cut small)


3/4 cup honey-roasted peanuts, coarsely chopped


To Make Sweet Tart Dough:
Put flour, confectioners' sugar and salt in food processor and pulse a few times to combine. Scatter pieces of butter over the dry ingredients and pulse until butter is coarsely cut in. Stir the yolk and add it a little at a time, pulsing after each addition. When the egg is in process in long pulses (about 10 seconds each) until the dough forms clumps. Turn the dough out onto a work surface and lightly knead to incorporate any dry ingredients. Butter a 9-inch fluted pan with a removable bottom. Press the dough evenly over the bottom and up the sides of the pan. You should save a little piece to do patchwork with later. The crust should still be crumbly, just be sure that the edges of the pieces cling to each other. Freeze the crust for at least 30 minutes, preferably longer, before baking. Butter the shiny side of a piece of aluminum foil and fit the foil, buttered side down, tightly against the crust. Place the tart on a baking sheet and bake in a preheated 375 degrees oven for 25 minutes (for a partially baked crust). To fully bake a crust (as in this tart), remove the foil, press down the crust slightly if it has puffed, and bake for another 8 minutes or so, until firm and golden brown.

For the Caramel:
Bring the heavy cream to boil. In another skillet over medium heat, sprinkle in 3 tablespoons of sugar. When it melts, stir with a wooden spatula or fork and sprinkle over another 3 tablespoons. When that sugar has melted, add in another 2 tablespoons. Stir in corn syrup and boil teh syrup until it reaches a deep caramel color. Don't worry if it begins to smoke. Stand back from the skillet and add in butter and salt if you are using it. The caramel will bubble and sputter. When the butter is in, add the warm cream. The caramel will bubble again. Lower the temperature a bit and let the caramel boil for 2 minutes (candy thermometer should read 226 degrees F). Let cool.

For the Ganache:
Place the chopped chocolate in a heat proof bowl. Bring the heavy cream to boil and pour half of it over the chocolate, allowing it to sit for 30 seconds. Stir in concentric circles, starting in the center and working your way outward. Pour in the remaining half of the cream and blend in the chocolate until smooth. Add in the butter piece by piece, stirring just enough to blend the ingredients. The less you work it, the shinier, darker, and smoother the chocolate will be. Cover the ganache with a plastic wrap right up against the surface of the ganache. Set aside at room temperature or refrigerate if not using immediately.

To Assemble:
Stir the chopped peanuts into the caramel. If the caramel has cooled too much and turned hard, gently warm it in the microwave for about 3 minutes. Spread the caramel in a thin layer over the bottom of the cooled tart shell. Refrigerate tart for 15 minutes to set the caramel layer. Pour the ganache over the caramel, making sure there are no air bubbles. Refrigerate assembled tart for 30 minutes (no longer) and keep at room temperature until serving time.

That recipe being said, I made a few changes. I made individual tartlettes, and used a different method for making the caramel. Mine is made with caramel candy and a touch of heavy bream, melted together. The resulting caramel will harden quite quickly upon cooling, so I just keep it in the pot I made it, and heat it up briefly before use. I also used pecans instead of peanuts. As for the tart crust, it was ok. I was a little nervous making it because the crust is so crumbly. It is very short-bread like, while I like a tighter, moister crust. The tart, or rather tartlettes, got good reviews.


Saturday, July 5, 2008

Daring Bakers - Danish Braid (chocolate croissants, etc.)


Finally. I'm sorry I'm so so late for June's challenge. I've been busy getting settled with my internship, continuing with Taekwondo and starting Judo. I've also ran out of eggs and sugar (how is that possible in my kitchen?!) I finally finished the laminated dough yesterday and assembled and baked the pastries today.

I was really excited for this challenge. I love croissants and danishes and I looked forward to playing around with different flavor combinations. I've been leery of making laminated dough before because of the sheer amount of butter involved. But after making buttercream that calls for 3 sticks of butter, 2 doesn't seem so bad ^.*

I made enough dough for 2 whole danish braids, but I'm taking my time baking them off. I know if I bake it all, I'll also eat it all. I used a third of the dough today for 2 small braids, 2 mini plain croissants, a chocolate croissant, and a pinwheel danish. I filled some of them with the caramel apple filling and the rest with bittersweet chocolate. The chocolate filling was just a small block of Belgian bittersweet chocolate. Once the chocolate croissant and braid had cooled a bit, I drizzled them with melted bittersweet chocolate. OMG, so good. I have to give the rest away before I eat it all.

For the dough (detrempe):
Makes 2-1/2 pounds dough


For detrempe:

1 tbsp active yeast
1/2 cup whole milk (I used 2%)
1/3 cup sugar
zest of 1 orange, finely grated (omitted)
zest of 1 lemon, finely grated (omitted)
3/4 tsp ground cardamom (omitted)
1 1/2 tsp vanilla extract
1/2 vanilla bean, split and scraped (omitted)
2 large eggs, chilled, lightly beaten
1/4 cup fresh orange juice
3 1/4 cups all-purpose flour
1 tsp salt

For beurrage (butter block):

2 sticks cold unsalted butter
1/4 cup all-purpose flour


To make dough:

Detrempe (direction for manual method):
  • Combine yeast and milk in a bowl. Add in beaten egg, orange juice, sugar, vanilla, cardamom, vanilla bean, and zest. Mix until well blended.
  • In another bowl sift together flour and salt. Make a well in the center and pour in the wet ingredients.
  • Bring the flour into the wet mixture. Knead until smooth (about 5 minutes). Add more flour if it is sticky (the feel of the dough depends on the humidity). Transfer the dough ball into a floured board and pat into a rectangle. Wrap and refrigerate for 30 minutes.
Beurrage:
  • Cut butter into small cubes or grate using a box grater
  • Combine butter and flour in a bowl with high sides and beat until smooth and lump-free
  • I cubed my butter and tried to use a hand-held electric mixer on it. I got flying pieces of butter everywhere. So instead I mashed the butter into the flour with the back of a spoon, then used the mixer to smooth it out at the end. Set aside at room temperature for 30 minutes.
To make laminated dough:
  • After the detrempe has chilled for 30 minutes, turn it out onto a slightly floured surface. Roll the dough into a 18x13 inch rectangle (approximately 1/4 inch thick).
  • Spread the butter on the right 2/3 of the dough. Fold the left 1/3 (the portion without butter) to the right, covering half the butter. Fold the right 1/3 of the rectangle over the center third. You should never fold butter onto itself. This is the first turn. Wrap the rectangle and refrigerate for 30 minutes.
  • Place the dough lengthwise on a floured surface (the short ends should be to your left and right). Roll the dough into another 18x13 inch rectangle (approximately 1/4 inch thick) Again, fold the left 1/3 over the center third and the right 1/3 over the center third. This is the second turn. Wrap and refrigerate for 30 minutes.
  • Repeat the process two more times for a total of 4 turns. After the final turn, refrigerate the dough for 5 hours or overnight. If not using the dough within 24 hours, wrap tightly in plastic and freeze. Defrost the dough in the refrigerator for easy handling.
Caramel Apple Filling
Makes enough for 2 braids

4 Fuji or other apples, peeled, cored, and sliced into 1/4 inch pieces
1/2 cup sugar (I used brown sugar)
1 tsp ground cinnamon
1/2 vanilla bean, split and scraped (omitted)
1/4 cup fresh lemon juice (I used orange)
4 tbsp unsalted butter

Heat the butter in a pan over medium heat until slightly brown and nutty. Add the sliced apples, sugar, cinnamon, vanilla, and lemon juice. Saute for 10-15 minutes until apples are softened and the butter sugar mixture has reduced to coat the apple slices in luscious strands. Let the apples cool completely before using as a filling (and try to avoid eating all of them). Leftover apples can be used as a topping for ice cream, cheesecake, oatmeal, or just eaten straight out of the bowl.


Danish Braid


1/2 recipe of the above danish dough
1 cup apple filling, jam, preserves, etc.
1 large egg, plus 1 large egg yolk (for egg wash)

To assemble:
  • Roll danish dough into a 15x20 rectangle (1/4 inch thick). Place on a parchment-papered baking sheet to assemble.
  • Along the long side of the pasty, make parallel, 5-inch-long cuts, each about 1-inch apart, making sure to line up the cuts with the other side.
  • Spoon the filling of your choice down the center of the rectangle.
  • Starting with the top and bottom "flaps", fold the top flat down and the bottom flat up to cover the filling. Next fold the side strips over the filling, alternating left and right, until finished.
  • Beat together the whole egg and yolk in a bowl. Using a pastry brush, lightly coat the braid.
  • I was out of eggs by this point, so I just brushed the pastries with milk.
To Proof and Bake:
  • Spray cooking oil onto a piece of plastic wrap, and place over the braid. Proof at room temperature for about 2 hours, or until doubled in volume and light to the touch. My braid didn't rise too much during this process.
  • Near the end of proofing, preheat the oven to 400 degrees. Position a rack in the center of the oven.
  • Bake for 10 minutes, then rotate the pan so that the side of the braid previously in the back of the oven is now in the front. Lower the oven temperature to 350 degrees and bake about 15- 20 minutes more, or until golden brown. The baking time will be shortened if you are making smaller braids or danishes.
  • Since my braids and danishes were smaller, I only baked them for 8-10 minutes after reducing the temperature.
  • Cool and serve the braid either warm from the oven or at room temperature.
fold left 1/3 over middle 1/3


fold right 1/3 over middle 1/3


Friday, June 20, 2008

Toffee Almond Bars


Beach picnic: turkey and swiss cheese sandwich, washed down with cinnamony horchata, and finished off with gooey toffee squares.

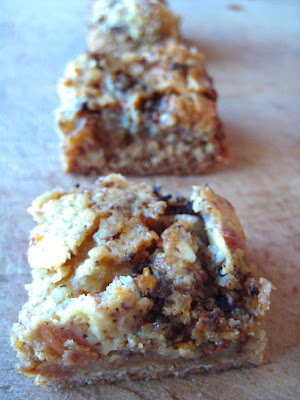
This recipe is from Alpineberry, and gave me a way to use up half a box of cake mix. The original recipe called for toffee bits, but I found that Almond Rocas, which have the ultimate combo of chocolate, almond, and toffee, work very well.

Toffee Almond Bars
9x13"

Crust:
1 box yellow or white cake mix
1/2 cup butter, softened
1 egg

Filling:
1 can condensed milk (16 oz)
1 egg, beaten
1/2 cup toffee bits or chopped almond rocas
1/4 cup chopped almonds

Mix cake mix, butter, and egg until combined. Pressed into a 9x13" pan. Bake in a 350 degrees preheated oven for 7 minutes. The crust wouldn't look done.

In the mean time, combine egg and condensed milk. Stir in toffee bits and chopped almonds. Pour filling on baked crust. Bake for 24-30 minutes until top is browned. Let bars to cool before cutting; this allows the filling to set.

Wednesday, May 28, 2008

Daring Bakers - L'Opera ~ the scent of coconut


What a challenge!

When I read about this month's challenge - a traditional French Opera cake - I nearly clapped my hands in glee. Now this was the stuff I wanted to make - beautiful, elegant, complex, a multi-stepped whirlwind of a challenge. There were the layers of jaconde soaked with syrup, buttercream, chocolate mousse, and chocolate ganache, all with the potential to go terribly wrong. Because May is liveSTRONG month, the cakes were suppose to be yellow or light in color. I decided to go with coconut, almond, and vanilla.

The jaconde, an almond genoise made with almond meal and leavened with beaten egg whites, was light and delicate. I made my own almond meal, so the texture was perhaps not as fine as it should have been. But I rather like slightly coarse feel of the cake. I left this base flavored simply with vanilla, choosing to incorporate my flavorings into the other components. My problem with this portion of the recipe was that it stuck horribly ot the pan. I accidently forgot to put down parchment paper, and despite having buttered the pan generously, the cake needed a lot of coaxing to come out. Note to self, next time a recipe calls for parchment paper, don't forget it. I brushed on a syrup flavored with coconut cream.

The French buttercream didn't come out as well as the Swiss buttercream from Dorie Greenspan's party cake recipe. While smooth on the palate, it was too loose coming together. I prefer a firmer buttercream to work with. I flavored this with also with coconut cream and vanilla.

The white chocolate mousse was just plain delicious. Melted Ghiradelli white chocolate lightened with freshly whipped cream, flavored with coconut - it tasted like a Ferroro's Raffaello. I also made a white chocolate ganache to top the cake. However, I felt the combination of the mousse and ganache was too much. Because the traditional L'opera cake is made with the darker chocolates and flavored with coffee, it is less cloying, with the bitterness of the chocolate and coffee balancing the sweetness of the other ingredients.

Overall, I felt very proud of myself for accomplishing this challenge. I like producing something delicious from my kitchen, but I also love the entire process - making the different components, tasting as I go along, assembling.


Saturday, April 19, 2008

mmm...chocolate


I love Ina Garten and her show, Barefoot Contessa. I find her incredibly intelligent and very engaging, even if she seems to overly dote on her husband. Her emphasis on fresh, high-quality ingredients is what makes her simple recipe so good. With that said, I tried my hands at her, or rather, Beatty's Chocolate Cake. Her recipe makes a 2-layered 8-inch cake, but I went with cupcakes instead, with a yummy almond buttercream toffee frosting adapted from Gale Gand.
The cupcakes were moist but didn't taste very chocolatey when they were warm. However, the flavor intensified as they cooled. The texture was light and fluffy, not greasy at all. They were excellent paired with the buttercream frosting.

Beatty's Chocolate Cake from Ina Garten
makes about 24 cupcakes

1 3/4 cups all-purpose flour
1 3/4 cups granulated sugar
3/4 cups cocoa powder
2 tsp baking soda
1 tsp baking powder
1 tsp salt
1 cup buttermilk
1/2 cup vegetable oil
2 eggs
1 tsp vanilla extract
1 cup hot coffee

Preheat the oven to 350 degrees F.

Sift flour, sugar, cocoa, baking soda, baking powder, and salt into a bowl, and stir to combine. In another bowl, combine the buttermilk, oil, eggs, and and vanilla. Add dry ingredients to wet and stir until just combine. Add in coffee and mix, be sure to not overbeat. The batter will be thin. Divide the batter into a prepared (buttered) cupcake tin, filling to about 3/4 full. Bake at 350 degrees for 17-20 minutes, until a cake tester comes out clean. Cool in pans for 10 minutes, then turn them out onto a cooling rack and cool completely. Frost with favorite frosting.


Almond Buttercream Toffee Frosting from Gale Gand

3 cups confectioners' sugar
1 cup butter, softened
1 tsp almond extract
2 tbsp whipping cream
1/2 cup toffee bits

Using a hand-or standing-mixer fitted with a whisk, mix together sugar and butter, starting at low speed until well blended and then increase speed to medium and beat for about 3 minutes. Add almond extract and cream and continue to beat for 1 minute more. Frosting should be thick and fluffy. Fold in toffee bits.

Monday, March 17, 2008

Japanese White Chocolate Almond Cheesecake


I'm so glad I stumbled across this recipe. It makes a really unique and tasty cake, reminiscent of the airy sponge cakes you get at Chinese bakeries. The recipe for a 9-inches cake only has 3 tablespoons of flour and 1 1/2 tablespoon of cornstarch. It's lightened with beaten egg whites, and baked in a water bath. The first time I made it, I simply flavored it with vanilla, and found that it tasted too much of cream cheese and egg. I adapted the recipe this time by adding in melted Ghirardelli white chocolate and almond extract. It got the approval of me and some of my friends. It doesn't rise very much and comes out smooth and flat on top. I'm thinking of tripling the recipe and making a layer cake next time.

Japanese White Chocolate Almond Cheesecake
Makes 1 9" Cake

3 ounce package of cream cheese
1/3 cup milk
2 egg yolks
4 tbsp white sugar, divided
3 tbsp all purpose flour, sifted
1 1/2 tbsp corn starch, sifted
2 egg whites
1/3 tsp cream of tartar
1/4 cup white chocolate chunks
1/2 tsp almond extract

Combine cream cheese, milk, and white chocolate chunks in a small saucepan over medium heat. Stir occasionally until cream cheese and chocolate has melted. The mixture wouldn't be completely smooth, but try to get out the big lumps. Let cool.

Meanwhile, beat the egg yolks and 2 tbsp sugar until light and fluffy. Add in the cooled cream cheese mixture and beat until smooth. Add in almond extract. Stir in sifted flour and cornstarch until combined.

Using an electric mixture with clean beaters, beat the egg whites with the cream of tartar until soft peaks form. Gradually add in 2 tbsp of sugar until white whites reach stiff peak stage. Gently fold egg whites into the cream cheese mixture. The mixture should be smooth and look like clouds. Pour into a 9" parchment-lined pan, or a greased springform pan with a removable bottom. If using a springform pan, wrap the pan in foil so that water will not leak in.

Bake in a preheated 350 degrees oven in a water bath for 20 minutes. Then turn the oven down to 300 degrees and continue to bake for 15 minutes. Allow cake to cool before removing from pan. If using a springform, simply remove the side of the pan. If using a regular baking pan, invert cake onto a plate, peel off the parchment and re-invert onto another plate.

A few notes:
  • When beating egg whites, make sure there are no fats coming into contact. That means no bits of egg yolk and clean beaters and bowl. Any amount of fat would prevent the egg whites from reaching stiff peaks. Since they are the leavening agent (in a sense of speaking) in this recipe, it is very important that they are well beaten.
  • A water bath is used to maintain a moist environment so the cheesecake doesn't dry out. To make a water bath: place the cake pan inside another larger baking dish. Pour hot water into the baking dish until it comes about halfway up the side of the cake pan. Be careful to not get water into the cake mixture itself. It is best to set the baking dish on the oven rack first, place the cake pan inside, and fill with water from a kettle. You can prevent a lot of grief and potential burns this way.
  • The top of the cake never takes on much color. If you like it pale yellow (which is still pretty) you can just follow the baking instructions above. I like to turn on the broiler for about 30 seconds at the end to brown the tops. Just a matter of preference.

for Perry...


Since I'm trying to cut 5 more pounds before the end of the month, the urge to bake is proving problematic. I usually have the best intention beforehand to set aside some of the goods to eat later. Well that doesn't always work out. So instead, I've decided to just bake for other people. These chocolate chunk banana crumb muffins are for my friend Perry. They came out moist and delicious, not too dense, with a great banana flavor. The semisweet chocolate chunks are wonderfully melty when the muffins are warm, and the crumb topping adds a contrasting texture component. Too bad I could only eat one :(

Chocolate Chunk Banana Crumb Muffins
Makes 12 muffins

Muffins:
1 1/2 cup all purpose flour
1 tsp baking powder
1 tsp baking soda
pinch salt
3 large ripe bananas, mashed
1 egg, beaten
1/3 cup white sugar
1/3 cup brown sugar
1/3 cup oil
1/2 tsp cinnamon
1/2 cup chocolate chunks

Crumb Topping:
2 tbsp cold butter
4 tbsp all purpose flour
1/4 tsp cinnamon
1 tbsp raw or turbinado sugar

Blend mashed bananas, brown and white sugar, oil, and egg until combined. Stir in flour, baking powder, baking soda, salt, and cinnamon until moistened, being careful to not overbeat. Fold in chocolate chunks. Pour into greased or lined muffin pans to about 3/4 full.

To make crumb topping, cut cold butter into the flour, cinnamon and sugar until coarse. Add a spoonful on top of each muffin. Bake in a preheated 375 degrees oven for 18-20 minutes or until a toothpick comes out clean.

Friday, February 29, 2008

the cookie monster


Conversation with my lovely 8-year-old sister:
Me: Dad's coming to see me next week. Do you want me to make something for him to bring to you?
Sister: Hmm....COOKIES! No one makes them quite like you.


Since I was spending the day baking Julia Child's French bread anyways, I thought I'd make a care package for the little one as well. After jogging to Berkeley Bowl's for semisweet chocolate chunks (and nuts and dried fruits), I baked up five types of cookies - oatmeal raisin, white chocolate macadamian nuts, semisweet chocolate with walnuts, oatmeal raisin with dark chocolate, and white chocolate cranberry. I found that with two basic cookie recipes, endless variations are possible. Needless to say, I had a lot of fun, and ate a lot of cookies. Cook's privilege :) The chocolate walnut was especially good.

Chocolate Walnut Cookies
makes about 2 dozen small cookies

1/2 cup unsalted butter (softened)
1/2 cup brown sugar
1/3 cup white sugar
1 egg (beaten)
1 tsp vanilla extract
1 1/2 cup all purpose flour
1/2 tsp baking soda
pinch salt
3/4 cup semisweet chocolate (chopped)
1/2 cup walnuts (chopped)

Cream butter and sugar until well blended. Beat in egg and vanilla until smooth. Combine flour, baking soda, and salt in a separate bowl, and add into butter mixture. Mix until combined. Fold in chocolate chunks and walnuts. Drop by heaping spoonfuls onto greased cookie sheet and bake in a 375 degrees preheated oven for 8-10 minutes. Remove from oven while cookies are still soft in the center and let cool on sheet.


Enjoy the chewy, soft cookies with a cold glass of milk. It's a good treat anytime.

Friday, January 25, 2008

<3 trader joe's


I really appreciate small markets like Andronico's and Berkeley Bowl. They not only carry unique foodstuffs that you can't find at those impersonal chain supermarkets (i.e. Safeway) but usually the quality is better and the produce fresher. I mean, come on, why buy a jar of Jiffy's peanut butter that's been package god-knows-how-long-ago when you can get a container of honey roasted peanut butter that you freshly ground yourself. I'll be the first to admit, living in the Bay area has completely spoiled me. A Trader Joe's recently opened not too far from my apartment (relatively speaking), greatly adding to my joy and eating pleasure. I love their white stilton with dried apricots, tiramisu gelato, and huge hunks of Ghiradelli chocolate. I got a piece of white chocolate and made these white chocolate walnut cranberry cookies. I thought the combination of white chocolate and cranberries would be strange, so I made a batch without cranberries. I definitely like the cookies with. The tartness of the cranberries adds a freshness and cuts through the sweetness of the dough. You can soak the cranberries in either juice or alcohol until they're plump. I also tossed in 1/2 cup of chopped walnuts because I personally like nuts in my cookies. I had them already toasted, but untoasted would also be fine.

White Chocolate Walnut Cranberry Cookies

makes about 2 dozen small cookies

1/2 cup unsalted butter (softened)
1/2 cup packed brown sugar
1/3 cup white sugar
1 egg (beaten)
1 tsp vanilla extract
1 1/2 cup all purpose flour
1/2 tsp baking soda
pinch salt
3/4 cup dried cranberries
1 tablespoon cranberry or orange juice, or 1 tablespoon rum or calvados
3/4 cup white chocolate chunks
1/2 cup chopped toasted walnuts

Soak dried cranberries in juice or liquor.
Cream butter and sugar until well blended. Beat in egg and vanilla extract until smooth. Combine flour, baking soda, and salt in a separate bowl, and add into butter mixture. Mix until combined. Fold in cranberries, chocolate chunks, and walnuts. Drop by heaping spoonfuls onto greased cookie sheet and bake in a 375 degrees preheated oven for 8-10 minutes. Remove from oven while cookies are still soft in the center and let cool on sheet.

Enjoy~

Thursday, January 17, 2008

dark chocolate


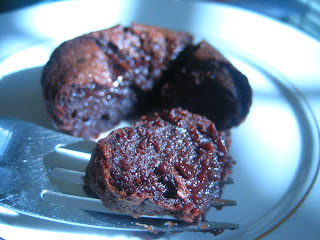
Dark chocolate molten cake, my final treat to my family before i left for Berkeley. So good....
Good thing about this cake is that the batter is actually better if made in advance. The egg in the mixture will have a chance to relax and deflate, producing a dense, chocolatey cake. Put the batter in the fridge up to a day before, and bring to room temperature before baking. Enjoy.

Dark Chocolate Molten Cake
Make 4 large muffin sized cake or 6 regular muffin sized cake


1/2 cup unsalted butter

4 ounces dark chocolate
3 large eggs
1/4 cup granulated sugar
3/4 tablespoon brewed coffee
2 teaspoon flour

Melt chocolate and butter in a double boiler over medium heat, let cool. Beat eggs and sugar together in a separate bowl until smooth and pale. Add to chocolate mixture and mix until smooth. Stir in coffee. Sift in flour and mix to combine.

Line muffin tins with liner and divide batter evenly between each well. Bake at a 450 degrees preheated oven for 6-8 minutes (for the regular size tins), depending on how you want the center. 6 minutes will give a fairly liquid center and 8 minutes gives a very moist, pudding-like center, both of which are wonderfully rich and decadent.


Wednesday, January 9, 2008

simplicity at its best...


There's nothing more appealing than a batch of chocolate chip cookies fresh out of the oven, the smell perfuming the kitchen, the delectable morsels beckoning. Break one in half to see the melting chocolate dotting the soft interior - none of those crisp cookies here, just simple, chewy, and delicious. I've searched for the perfect chocolate chip cookie recipe for a long time and finally came across this one. Before this, my cookies have come out cakey and puffy, but this recipe gives the bakery-style chewy cookies that I love.

A few notes about these cookies:
  • The butter must be melted
  • The cookies will not look done after you pull them out of the oven. Let them rest on the cookie sheet until they set. If you bake them any longer, they will harden as they cool
  • I always use chocolate chunks; I find that chips don't melt and you end up with hard pieces of chocolate in your cookies. If you like that, then by all means use chips, but I like my chocolate melted and gooey. I usually use the semi-sweet chunks from Berkeley Bowl (they come from the dispenser) or else chop up a chocolate bar
  • Feel free to add in nuts, toffee bits, chocolate-covered espresso beans, etc.
Chocolate Chunk Cookies (adapted from Allrecipes)
make about 20 cookies

2 cups all-purpose flour
1/2 tsp baking soda
a pinch salt
3/4 cup (1.5 stick) unsalted butter (melted)
1 cup packed brown sugar
1/2 cup granulated sugar
1 tbsp vanilla extract
1 egg
1 egg yolk
1 1/2 cup chocolate chunks (dark, semisweet, or milk)

Beat melted and cooled butter with brown and granulated sugar until well blended. Beat in vanilla, whole egg and egg yolk until light and creamy.

In a separate bowl, combine flour, baking soda, and salt. Add into wet ingredients and stir until just mixed. Be sure to not overworked the dough. Stir in chocolate chunks and additional add-ins by hand. Refrigerate dough for 10 minutes.

Drop by 1/6* cup fulls onto greased baking sheet, leaving plenty of space in between. I usually fit about 6 onto a standard 15x12 baking sheet. Bake in a 325 degree preheated oven for 11-13 minutes. Pull them out when slightly golden and let them cool on baking sheet.

*You can also make giant cookies using 1/4 cup dough per cookie. Bake for 15-17 minutes.